
Courier Item Editor
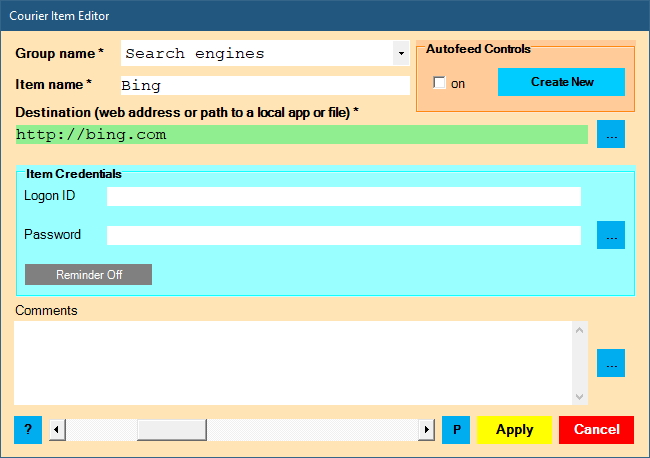
Here is where you edit all aspects of an item.
You can also launch any of three child windows: the Autofeed Editor, the Password Generator, and the Comments Editor.
Required Fields:
- Group name
- click the down-arrow to select another group to move the item to
- to rename the group, use the rename group function in Settings editor
- Item name
- type in the item’s name as it should appear in the group’s item list
- Destination (web address or local file)
- type or paste a destination Internet address (HTTP/FTP/FILE)
- click the blue box at the right to browse and select a local file or folder (ex/EXE/PDF/DOCX/XLSX/etc)
- Tip: surf to a web page, then copy and paste its web address from your browser (ex/ "http://"…, "https://"…, "ftp://"…, or "file;//"…
- Tip: right-click any local icon/shortcut then copy and paste the file’s pathname here
- Courier attempts to validate the destination value then shows a result color:
- green – destination is valid
- yellow – destination may or may not be valid
- red – destination is invalid
Optional Fields:
- Comments Etc.
- this is a standard multiline text field for any purpose you choose
- click its blue function button to open a larger edit window
- maximum length is 32,767 characters
- Logon ID
- type in the item’s logon ID
- logon IDs are rarely case-sensitive
- Password
- type in the item’s password, or click the blue box to display the password designer tool
- passwords are almost always case-sensitive
- if Caps Lock is on, background will show light red
- Reminder On/Off
- this reminder is for this item only
- click the button to toggle reminder on or off
- choose a future date you want to be reminded to change the password
- remember to advance the reminder date each time you update the website/app password
Comments Editor
The Comments Editor shows the item’s comments text in a much larger workspace.
To open it click the blue button to the right of the comments box.
Click here for detailed information about the Comments Editor.
Autofeed Controls
You can switch an autofeed on or off by clicking the “on” box.
Click the “Create Autofeed” button to open the autofeed editor then create a new autofeed.
Click the “Edit Autofeed” button to open the autofeed editor then edit an existing autofeed.
To delete an autofeed, delete all its steps.
Click here for detailed information.
Toolbar Buttons

The toolbar contains a horizontal scrollbar, an Apply button, and a Close button.
- Horizontal scroll bar
- click this item to quickly step forward or back through this group’s items
- [Warning] clicking this control will NOT apply work done on current item
- Print item button
- before clicking, pre-select your active printer
- click to send image to printer
- Apply button
- validates item data, reports any issues, then closes the window
- Apply remembers your work — but only the Settings Editor Save button makes changes permanent
- Cancel button
- abandons most changes then closes the Item Editor
- [Warning] clicking this button will NOT validate or save any work done on the current item and autofeed
Click here for the knowledgebase index.


